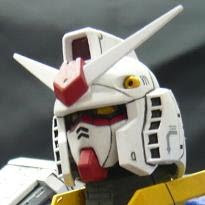
As you guys noe.. or dunno.. RX-78-2 Ver.OYW's LEGS uses the OLD Ver.1.5 RX-78-2's legs.. so the WHOLE leg is molded together.. with the hydraulic pumps locked to each other.. unlike the newer models now.. i.e Force Impluse.. where the rods and pump is molded seperately, making it easier to paint. So.. it has always been a problem to me.. as a new modeller painter.. on how to paint the pump without scraping the paint when its close...
My solution came to me frm Japan.. literally. hahah.. and tt's Kawaguchi Sensei.. =DD i consulted him abt the problem and he told me to thin down the rods so as when you paint.. the new layers of paint would not be scratched when you closed it.. so i followed his advice..
Painted half the pumps alr.. its molded together so i cant separate it.. i placed some blu tack behind to keep the rods frm sliding.
As you can see.. i used Gundam markers as its easier for my first try. Wanted to get the Metallic Silver Chrome Gundam marker, but apparently its sold out in my country since last year. =( so i could onli settle for a lesser silver. better den nth for me. ^^.
Closer look.. a painted and a primed.
After finishing the pump.. i looked for some details that i can paint.. ^^. near the upper things and the foot thrusters.. very happy with the results!
This is how it looks like after i assemble it on to the main body.. maybe i'll do some dry brushing after that.. some silvering on the internal frame.. woooo..
That's all i've done! would be starting to spray paint the armor and such.. its gonna be a slow process... so pls wait patiently for my next post! haha... hope you like wad you see... any questions or comments pls let me noe k!
(^^)" レンです! じゃね!


Very nice! Can't wait for your next wip ^^
ReplyDeleteLooking great! I'm going to have to make sure to do this on my Hi-Nu as to bring out all the details. Keep up the great work!
ReplyDeleteNow that I think about it, how did you go about thinning down the rods?
ReplyDeleteFrom the pictures think ren actually detached the rods from the frame and sanded them judging by his third picture.
ReplyDeletethanks alot guys! =D very glad you guys liked it.. ^^ more motivation!! haha..
ReplyDelete@lupes: (disclaimer: long tutorial! can skip to next para.)oh.. i was told to sand it down with sandpaper by Kawaguchi sensei.. but i when i got home, i found it realli hard.. even when using 400 grit.. so i decided to use my modelling knife to slowly scrape it off.. like removing a nub?
First, i put a blutack behind the 'pump' to stop the rod frm sliding. Smthing to note abt these 'rods' are, e part closer to the pump is actually thinner den e other end. notice its loose when you hyper-extend it but it gets tighter the more you close it. so you have to scrape e other end more. so i placed the knife perpendicular to the surface of the rod and went one round.. followed by the next rod. i think have to keep in mind not to let ur rod turn out too squarish? i judged it visually. you can give a good scrap cos it took me quite a while to thin it down. den i use a very thin strip of 600grit SP to smooth out some rough edges. thin enuff to wrap and go thru between e rods...
so finished with e rods.. now for the pump. yes.. oso need to mod the pump. dun worry its easier. when you slide and close you can see which part of the pump is 'clamping' the rod as it shuts. so i jus slightly thin the side walls. there's oso two tiny edges at the corner of e pump.. i cut it out oso to remove any restriction..
yups.. *deep breathe..* hope it helps!! =)
@chubbybots: yups.. i took out the whole pump out frm the frame.. but the 'pump' and the 'rod' is actually molded to each other.. so its lock.. cant take out.. the furthest i can extend it is like my 1st and 2nd pic.. heh.
Ren! ^^
Awesome, thanks a bunch! This'll definitely help me out. :)
ReplyDeletesure! no problem dude.. i have much to learn frm all of you guys.. =) i love your RX-78-2 Ver. Lupes too.. very real colour. My RX looks timid now.. hahaha.
ReplyDeleteThank you! It was one of the first kits I handpaited and led to my getting more comfortable with painting my kits. :)
ReplyDeleteThat's the nice thing about the gunpla community, most of the people are friendly and more then happy to share tips and information with each other. Without the people I know, I'm sure my abilities would be as far along as they are. Looking forward to your OWY and further projects from you! It's great to see your skills improve and be able to have a bit of a log to track that progression.
It's still acting up, but I can just comment using Name/Webpage and not have any problems.
Couldn't agree with lupes more! Hee thats the wonderful thing about posting our stuff online, its the sharing and helping each other out that helps make this hobby more enriching ^^!
ReplyDelete=DD thanks guys..!! yups.. me learnt alot from you guys and the community.. realli grateful! so tt's why i started this blog to sort of return the favor.. heh. i'll try more stuff as i go.. save $$$ to buy tools. haha.. and looking forward to you two guys models too! Exia and Gouf Ignited.. haha.. CHEERS! TO GUNPLA!~
ReplyDeleteRen.