Some minor details.. dry brushed the internal frame..
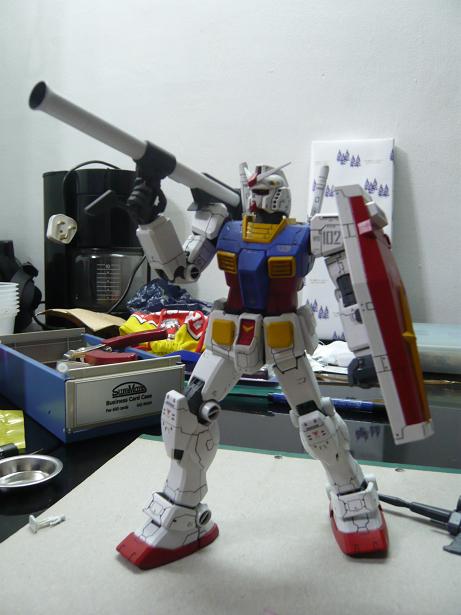
Full Body.
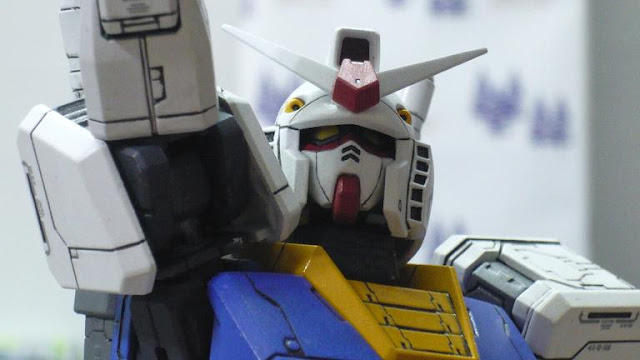
Painted the eyes clear yellow and used gundam marker gold as the reflective side. Not realli obvious here.. x.x Painted the Head-guncannons too! very pleased with the results. =)
Front view.
Back view. Some minor testing i did with the paint on the backpack..
Side view. i like this view too..
Legs.
Head and Body. ^^
Painted the Cockpit too! ^^


Weapons & Shield. thankfully the decal transfer was okay! =)
Some simple poses..
RX-78-2 with its baddass hammer! Dry painted the hammer gunmetal too.. ^^
The amount of extension as you can see from the legs.. its quite wide for an old 1.5 frame. it turned out better den i've expected. =) but this is oso when i scrapped some of the paint off.. T.T
Was trying to recreate the box cover.. hahah.. but epic fail!
the waist joint tho very smooth, but doesn't bend that much..
THE Famous pose of RX-78-2. There!!! the eyes!! Sorry i din dare to remove the hands and head.. =P
Hyper Bazooka!! the hand wasnt in a good position to grip but with a little positionin, its not that bad.
Loved this shot. Somehow all Gundams look nice when they just do absolutely nothing. Don't you agree? ^^
I managed to apply ALLLL the decals but one. can you spot it?? #^%$@$#^! Tho its very very small.. it's significant becos it comes in a pair. argghhhh.. i think you understand how it must have felt. its not 100% anymore-kinda-feeling. but i got over it.. and topcoated it mattt....
RX-78-2 is my first painted kit and doing it on the Gundam's 30th Anniversary with the aid of Kawaguchi Sensei definitely made it a memorable experience for me. Of course.. i do noe that this is not a perfect painted piece.. but it does meant alot for me.. its like a next level that other pple describes.. the stepping out of jus snapping kits together, the patience you need to have when you make stupid mistakes. i noe i did. *nods* haha.
Using spray cans definitely made me wanna try airbrush.. hahahha.. becos i find that i cannot control the amt of paint that comes out.. and this caused the paint to build up too quickly.. other den drowning out the panel lines making panel lining a headache, some movements will cause the paint to chip and crack.. O heart breaking moments. So my next painted kit would likely to be airbrushed.. im not too sure whether i wanna paint my PG strike or not.. wad do you think?? paint? dun paint? not to mention.. MG Exia.. MG WZC.. Decisions decisions decisions...
I think i took too much photos for RX-78 alr.. haha. so i'll have to split the completed post into two.. This is by no means a review cos i dun think i have enough brain juice and experience in reviewing gunpla kits.. But i'll put up little notes i've remb abt the kit as i type..
Of cos.. you guys can ask me anything abt the kit.. and i'll try my best to answer to my knowledge.. You can also find a complete review of an unpainted kit of MG RX-78-2 Ver. OYW at ガンプラ命- Z's "Real" Gundam Model Review. this is where i get my review of most MG gunplas.. helps me decide wad kits to buy.. =) thanks Z!
SO.. this is all for part 1 of the completed post.. hope you like the photos and din find it too much... this is my first time painting.. so pls go easy on me... heh. In the next upcoming post abt completed RX-78-2, i'll use a simple black backdrop for photo taking.. keep checking this space out! i'll see you guys ard!.. cheers.. ^^.
(^^)" レンです! じぇね!


A very good job for a first fully painted gundam...so much better than mine! Can really see your efforts in making this kit as best as possible ^^.
ReplyDeleteyou are right about the problem with control over spray cans and the paint getting too thick. I guess thats also why you had the paint cracking.
Looking forward to part 2 ^^. And by all means just put up the pictures that you like. Cheers!
awesome, you did an excellent job! i understand about losing decals, my lastest kit i lost maybe 60-80% of wet decals LOL my first time using them and applied too early ^^;
ReplyDeletei think the paint turned out good, and i like how airbrushed kits look so if you can do that definitely go for it ^^ and test out on a smaller kit before doing the PG!
enjoyed all the pictures and seeing the action poses ^^
@chubbybots: thanks alot!!! =) i still alot to learn frm you masters.. i HG onli. you all MG alr. hahaha.. yups.. me and my wallet learnt the hard way using spray cans... XD will definitely try to save up for a airbrush set. think HAG will have rite. The last time i went they ran out of the metal casing airpump.. was the plastic casing one instead. same price. but kept thinking tt the metal casing one is better... hmmm. $350+ altogether i guess.. eat white bread alr. haha.
ReplyDeletethanks! will put up the rest when im free.. =D glad tt you liked it. =)
@rockleelotus: thank you too!! jus my first try.. =D yups.. heartbreak when the decal's lost.. =O 60-80%!! my heart aches for you too man.. yups.. i like how airbrushed kits looked too. after looking at the PG Raiser 00 on NK.. it looks so nice painted.. jus a thin layer will make so much diff.. thanks for your advice! i'll definitely try it out... jus thinking of which kit do paint.. simple colours any stuff.. im having so much problem with opening the acrylic jars!! jus used once and they're locked dead for good.. any suggestions on how to maintain it? heh thanks!
glad you like the photos too!! heh.. more to come! ^^
Ren. ^^
This looks gret, Ren! For paint chipping, there isn't much you can do while posing for shots...the Blue Berserker had to be touched up in a few spots after the photoshoot as well, all I can say is be very careful, but whoopsies are inevitable.
ReplyDeleteFor the thick coat problem just spray about 30cm away (around a foot) and keep moving the can in a back and forth motion, it's important not to pause. Once you get a decent mist coat on let it dry for an hour or so and go back out and coat again. After a little practice you'll get better at i t, but your first result is very good! I love the attention to little details like the hydraulics as well!
My PG Astray was just a straight build+decals and topcoat, as you surmised. I'll likely be joining you on the PG Aile Strike, I've got a great idea for the paintjob. :)
hey thanks alot! i see.. the inevitable heartaches.. ha. i'm sure to try your method the next time i use spray can!! heh.. thanks thanks! =)
ReplyDeleteohh.. abt the PG Astray. it alr looks nice with jus the straight build + topcoat. haha.. cool. i'll be looking forward to your painted PG Strike..!!
Ren.
no problem! communities are there so we can all learn from each other :) The distance method does make you use up more paint (I used 5-6 cans for sinanju's blue, but the result speaks for itself) but gives you a degree of control over the paint, however limited.
ReplyDeletei will be too! thanks! and by all means feel free to add me to your blogroll, I added you guys to mine forever ago, heh..
Dude that is magnificent! I wish I had steady enough hands for really technical models...the best I can do is Zoids...
ReplyDelete