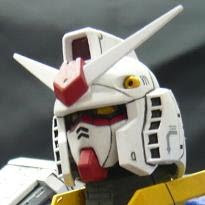
These are the easier parts to paint.. they dun need any mixing of paint.. white, midnight blue and for panel lining, black. i panel washed this kit actually, makes the panel line extremely thin. Loved it. ^^. i painted the eyes oso. a blood red mono-eyed. jus tt its too small.. >.<
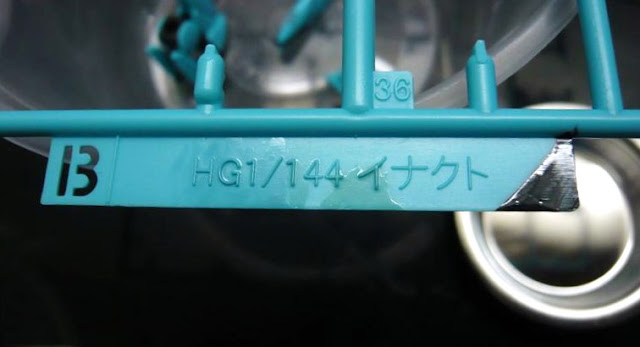
Smthing i've learnt from these 'easier' paint job is.. darker toned colors are much easier to apply den lighter tone. For example, painting with the midnight blue (the very dark color), it covers the plastic kit well and doesn't allow the kit to show its color beneath. But in the case of pure white. goodness. its extremely difficult to cover the plastic evenly and thus uneven blotches of the plastic kit color shows. you can see abit of the 'teal' showing in the above picture. Now i understand why pple say white is the most difficult color to apply. T.T
As for how i solve this problem.. not completely but lessen the color beneath is to apply many coats of white.. i find that using a thin layer first sets a coat over the plastic first.. den followed by slightly thicker & thicker coats to fully cover it.. remb to allow time for each layers to dry.
Next is the baby yellow that i need.. i din have the acrylic paint so i used my spray cans instead. Surprising, the spray cans behaved very well as i sprayed it closely to the tray. Nice spray can nice.. XD Camel yellow with white!
Applied it on the 'knees' ^^.
Today's main point.. the teal color that i need to recreate for Enact's gloves.. why cant they mould it in teal too?!?! Curses. Since the darker midnight blue is easier to apply den the other way round. XD Looking at the previous post, you'll find tt i din have the Sky blue color. yes. i rushed down to my nearest hobby shop to purchase it after i find that lightening the emerald green still doesn't ressemble the color of the kit. Btw, i din follow the color guide provided as the color needed was sold out. so i jus went with my instinct on the colors. ^^
This is the piece in question.. the 'gloves'. they provided stickies for it but i refuse to use it.. Sooo....
I was extremely pleased with i managed to mixed it RIGHT!!! wooot. you can see starting from the right.. is the emerald green with white.. den i slowly added the sky blue and viola! you can hardly see the paint difference on the most lefty... ^^ One tip i can give to newcomers to painters is.. always ALWAYS test your paint on the runners first.. =)
wahahhaha.. very happy. =D
Painted the gloves alr.. they gave an addition open hand too.. you can see tt it requires some clean up.. no worries as mentioned in the previous post, paint on bare plastic is very forgiving.. jus some fingernails and wooden sticks..........
its nicely cleaned up and lined! i noe its not perfect.. but its such a small kit, 1/144 you cant get smaller den this.. very small details are not really noticeable.. to me at least. XD still gonna do some touch ups.. becos teal, being a lighter tone needs multi layers.. you can see from the open hand there.. *points* the black base is showing. grrrr.
One tip abt getting rid of the paint tt leaked into the fingers.. you can see above is.. paint over it. cos the gap is SO tiny that my pointed stick couldn't reach it too.
The magical wooden stick. XD Oops i forgot to focus on the tip.
Alrites! tt's all the update you get today! quite exhausting to paint.. wait.. clean up.. touch up.. look for areas to repaint becos when lighter toned paint dries up, its slightly different than the first time you brushed over it; the thick paint will spread itself and thin down.. so you have to check. Follow this procedures.. rinse and repeat.
So.. the 'dish' for Gojira will finally be finished tml or the next few days i hope.. ^^. Hope you've learnt smthing from my boring post and i'll see you guys soon. =)
お楽しみに!
(^^)" レンです! じゃね!


awesome job! i learned a lot from this WIP ^^ cant wait to see him all put together... then be torn apart by gojira lol
ReplyDeletehow long do those paint jars generally last you? looks like they cost about the same as gundam marker so i might try this in the future ^^
I need color for paint all I have are grey,black,white,green,red and only have one cans tamiya spray black (most online shop not sell spray cans anymore >_<)
ReplyDelete@rockleelotus: haha.. thanks! yes. oh the irony.
ReplyDeleteoh.. i've jus started painting onli.. so they're barely used.. but i would say they last a long time considering tt you maintain them. And oso you have to mix it with thinner.. so it lasts quite long.. ya.. they're cheaper. BUT gundam markers doesn't require you to mix it with thinner and they dun dry up when capped. paint on trays do dry up faster and requires you to add a drop or two every now and then.. ^^
@moemoekyun: ohhh.. so sorry to hear tt.. there's no hobby shops ard your neighbourhood? acrylic paint with thinner can last you quite a while with most basic colors... ^^
ren.
Ah nice wip pictures ^^. Getting more delicious day by day :D
ReplyDeleteGodzilla....yum..
hhaha.. thanks. jus finished taking the photos for this kit.. gonna post it up soon. and prepare the que for Gojira san!! wooo.. ^^
ReplyDeleteren. =)